Whether you're a pro gardener or you're just starting out, these 10 seed starting tips will surely help you grow a better, more bountiful garden. Before anything can grow successfully, you must first take very good care of your seeds and seedlings. After all, the seed is the beginning of everything! These seed starting tips will ensure that whatever crop you wish to grow will do so in a quick and healthy way.
10 Seed Starting Tips

#1. Keep Records
In order to grow a successful garden, you need to get into the habit of record keeping. This means grabbing a journal or an online notepad and writing down what you planted, at what time, when it was harvested, what went wrong, and what went right. Keep a journal like this will help you to grow better next time around, and also teach you about planting times, what may have worked, and what may have not worked. That way, you won't repeat the same mistakes.
#2. Store Properly
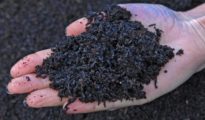
Store your seeds properly. If not, you risk contaminating your seeds as well as completely ruining them. Seeds do well when they're store in a dark, cool place. If you live in a warm climate, you can also store your seeds in the freezer. Make sure that your seeds are also stored in an airtight container or a Ziploc bag. To see if a seed is still viable, soak them in water for a few hours. The good seeds will sink, while the bad seeds will float.
#3. Avoid Overcrowding

It's very important not to over-crowd your seeds – this growing time is crucial for healthy growth. Use wide, flat containers that have good drainage for best growth.
#4. Tamp Seeds Down
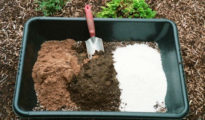
When planting, each seeds must be in firm contact with the moist surface of the soil in order to begin germinating. Use a kitchen sieve to spread soil-less seed starting mix evenly on top of the seeds. Then, gently tamp down the surface of the soil using a flat bottom bowl, glass, or pestle.
#5. Prevent Disease
Your seeds can actually get a fungal infection which is caused by excessive moisture and poor air circulation. Promote good air circulation by placing a small fan near your seedlings. Set it to low to encourage good air flow. To avoid excess moisture, spread a thin layer of 50% milled sphagnum and 50% starter chicken grit over the surface of the soil.
#6. Cover Trays With Plastic Wrap

Covering the trays with plastic wrap will keep the moisture level constant. Seedlings can be very sensitive to over-watering or under-watering, and so by placing plastic wrap over, you can make sure that your seedlings and their soil are always moist.
#7. Keep Seeds Warm
Keep seeds warm to encourage germination. Most seeds require a temperature of at least 65-75F to germinate successfully. Place seeds near a warm, sunny spot, or use a space heater. Be sure to check the soil moisture though, as warmer spots tend to dry out the soil much quicker.
#8. Turn Seedlings Daily
To make sure your seedlings get an even dose of sunshine, turn your seedling containers every day. Place the seedling container in a sunny, south-facing window, but make sure to turn the container daily.
#9. Feed Your Seedlings
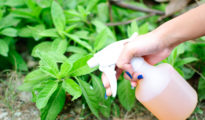
In order for your seedlings to grow healthy, you'll need to feed them. Most seed starting kits already come with a little nutrient package, so make sure to follow the directions properly. Once your seedlings have grown, fertilize once a week until growth is complete.
#10. Acclimate Seedlings
Before seedlings can be transplanted to direct sunlight, they need to be acclimated, or hardened off. Do this over a three day period by placing them in direct sunlight during the morning on the first day, then increasing their time outside by a few hours each day. This will give them time to get used to strong sunlight and prevent dryness.
Happy Planting!


